Severe weather can damage roofing systems in ways that require more than simple repairs. In Halifax and across Nova Scotia, strong windstorms, heavy rain, and winter ice buildup are among the most common causes of roof damage.
When this type of damage occurs, many homeowners turn to their home insurance policy to help cover the cost of repairs or replacement.
The roof insurance claim process can feel complicated if you’ve never gone through it before. Between inspections, adjuster visits, and contractor estimates, there are several steps involved before the work can begin.
Understanding how the process works ahead of time helps homeowners know what to expect and avoid unnecessary delays.
Step 1: Identify and Document the Damage
The first step in any roof insurance claim is confirming that damage has occurred. This often happens after a major storm event, but sometimes damage is discovered later during routine maintenance or a professional inspection.
Signs of potential roof damage include:
- Missing or lifted shingles
- Shingle granules collecting in gutters
- Visible roof leaks or water stains inside the home
- Damaged flashing or roof vents
- Debris impact from fallen branches
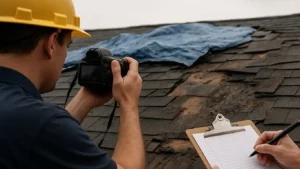
If you suspect storm damage, it’s important to take photos and document what you see. This documentation can help support your insurance claim later in the process.
However, homeowners should avoid climbing onto the roof themselves unless it is safe to do so. A professional roofing contractor can perform a proper inspection and identify damage that may not be visible from the ground.
Step 2: Contact Your Insurance Provider
Once damage has been confirmed, the next step is to contact your home insurance provider to begin the claims process.
When filing a claim, your insurer will typically ask for:
- The approximate date of the damage
- A description of the event that caused it
- Photos or documentation of the affected areas
- Your policy number and property information
After the claim is submitted, the insurance company will create a claim file and assign an adjuster to review the situation.
This is when the formal insurance claim process begins.
Step 3: Insurance Adjuster Inspection
The insurance company will send an adjuster to inspect the roof and determine whether the damage is covered under your policy.
The adjuster’s role is to evaluate:
- Whether the damage was caused by a covered event (such as wind or storm damage)
- The extent of the damage to the roofing system
- Whether repair or full replacement is required
- The estimated cost of restoring the roof
Many homeowners choose to have their roofing contractor present during this inspection. A contractor can help identify damage and ensure nothing important is overlooked.
This step is often where the scope of the claim is determined.
Step 4: Claim Approval and Scope of Work
If the insurance adjuster determines that the damage is covered, the insurer will provide a claim summary outlining what repairs or replacement work will be approved.
This document usually includes:
- The approved scope of work
- Estimated repair or replacement costs
- The homeowner’s deductible
- The payment structure for the claim
Most roof insurance claims are structured in two payments.
The first payment is typically issued shortly after the claim is approved. This amount helps cover the initial cost of the roofing project.
The second payment is released once the work has been completed and the insurer receives confirmation that the roof replacement has been finished.
Step 5: Schedule the Roof Replacement
Once the claim is approved, homeowners can move forward with scheduling the roofing work.
Your roofing contractor will coordinate the installation timeline and order the required materials. Depending on the season and contractor availability, scheduling may take anywhere from a few days to several weeks.
During this stage, the contractor may also communicate directly with the insurance company to ensure the scope of work aligns with the approved claim.
This coordination helps prevent misunderstandings or unexpected costs later in the project.
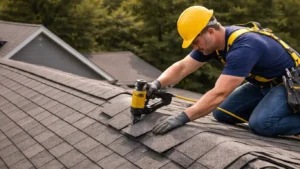
Step 6: Roof Installation and Final Documentation
After the roof replacement is completed, the contractor will provide final documentation confirming the work has been finished.
This documentation may include:
- Final invoice for the roofing work
- Photos of the completed installation
- Material warranty information
- Workmanship warranty documentation
The homeowner or contractor will submit these documents to the insurance provider to confirm the claim has been fulfilled.
At this stage, the insurer typically releases the remaining payment associated with the claim.
Common Misconceptions About Roof Insurance Claims
There are several misunderstandings homeowners often have about insurance claims for roofing damage.
One common misconception is that insurance will automatically cover roof replacement simply because the roof is old.
In reality, insurance policies generally cover sudden damage from covered events, such as windstorms or fallen debris. Gradual wear and aging typically are not covered.
Another misconception is that filing a claim automatically guarantees approval. The adjuster must confirm that the damage meets the requirements of the homeowner’s policy.
This is why professional inspections and proper documentation are so important.
Timeline Summary
Roof insurance claims can feel overwhelming at first, but the process becomes much easier once you understand the steps involved.
Most claims follow the same general timeline:
- Damage is identified and documented
- The homeowner contacts their insurance provider
- An adjuster inspects the roof
- The insurer approves the scope of work
- The roof replacement is completed
- Final documentation is submitted for payment
If your roof has been damaged by a storm in Halifax or elsewhere in Nova Scotia, working with an experienced roofing contractor can help ensure the claim process moves forward smoothly.
A knowledgeable contractor can assist with inspections, documentation, and coordinating with the insurance company so your home is protected as quickly as possible.