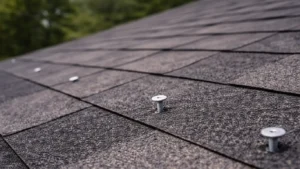
Many homeowners assume that shingles are the primary defense against roof leaks. While shingles do shed most rainwater, the true leak protection on a roof often comes from a less visible component: flashing.
Roof flashing is a thin metal material installed in key areas where water could potentially enter the roof system. These locations include roof intersections, edges, and areas where structures penetrate the roof surface.
When properly installed, flashing directs water away from vulnerable joints and safely down the roof toward the gutters.
Although flashing represents only a small portion of the roof, it plays one of the most important roles in preventing leaks.
What Is Roof Flashing?
Roof flashing is typically made from metal such as aluminum, galvanized steel, or copper. These materials are durable, corrosion-resistant, and capable of forming a watertight barrier around complex roof areas.
The purpose of flashing is simple: redirect water away from seams and openings in the roof.
Because roofs contain many intersecting surfaces, flashing is necessary anywhere shingles alone cannot provide reliable waterproof protection.
Where Flashing Is Installed
Flashing is installed in several locations throughout a roofing system. Each type is designed to protect a specific area where leaks commonly occur.
Chimney Flashing
Chimneys create a large penetration through the roof surface, which makes them one of the most common sources of roof leaks.
Chimney flashing is installed around the base of the chimney to seal the joint between the chimney structure and the roofing materials.
Step Flashing
Step flashing is used where the roof meets a vertical wall, such as the side of a dormer or second-story wall.
Individual pieces of flashing are layered with each row of shingles, creating a stair-step pattern that channels water downward.
Valley Flashing
Roof valleys occur where two roof slopes meet. Because these areas collect large amounts of rainwater, flashing is often installed to reinforce leak protection. Metal valley flashing is a great choice for both its curbside appeal and weather protection without going for a full metal roof.
Vent Pipe Flashing
Plumbing vents extend through the roof to allow gases to escape from the home’s plumbing system.
Specialized flashing boots seal the base of these pipes and prevent water from entering around the opening.
Drip Edge Flashing
Drip edge flashing is installed along the edges of the roof to guide water into the gutters while protecting the underlying roof structure.
Why Flashing Is Critical for Leak Prevention
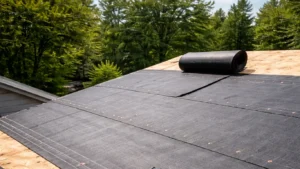
Shingles are designed to overlap and shed water across large, flat roof surfaces. However, shingles alone cannot effectively seal roof penetrations or intersections.
Without flashing, water could easily seep beneath shingles at these vulnerable points.
Flashing creates a sealed pathway that safely moves water away from these areas before it can reach the roof decking.
For this reason, many roofing leaks originate not from the shingles themselves, but from flashing that has deteriorated, shifted, or been improperly installed.
Common Flashing Problems
Over time, flashing can develop problems that allow water to enter the roof system.
Corrosion
Metal flashing may corrode after many years of exposure to weather. This can eventually create small openings where water can enter.
Loose Flashing
Strong winds or shifting roof materials may cause flashing pieces to loosen or separate from the roof.
Improper Installation
If flashing is not installed correctly during roof installation, gaps or improper overlaps may allow water to penetrate the roof.
Deteriorated Sealants
Sealants used around flashing may dry out or crack over time, which can reduce the effectiveness of the waterproof seal.
Flashing and Roof Replacement
When a roof is replaced, flashing should always be carefully inspected.
In many cases, roofing professionals recommend replacing older flashing components to ensure the new roof system has reliable leak protection.
Even if flashing appears intact, hidden damage or corrosion may exist beneath the surface.
Replacing flashing during a roof installation helps prevent leaks and ensures the roof performs properly for many years.
How Professional Roofers Install Flashing
Installing flashing correctly requires careful attention to detail. Roofing professionals layer flashing with shingles and underlayment to create multiple levels of protection.
The flashing must overlap properly and be positioned so that water naturally flows away from vulnerable joints.
Because these installations involve precise placement and sealing, professional installation is essential for ensuring long-term leak protection.
Signs Flashing May Be Failing
Homeowners may notice several warning signs if flashing begins to fail.
- Water stains on ceilings or walls
- Leaks around chimneys or skylights
- Rust or corrosion on exposed flashing
- Loose metal pieces along roof edges or walls
- Deteriorating sealant around roof penetrations
If these signs appear, a roofing professional can inspect the flashing and determine whether repairs or replacement are needed.
Flashing may not be the most visible part of a roofing system, but it is one of the most important components for preventing leaks.
By sealing roof intersections and directing water away from vulnerable areas, flashing helps protect the roof structure and interior of the home.
When installed correctly and maintained over time, roof flashing provides reliable leak protection and plays a key role in the long-term durability of the roofing system.